

Adding a new project
Let’s se how you can add a new project in Qobrix Real Estate CRM.
In order to add and configure a project, you navigate to Projects from the main module list and then you press Add.
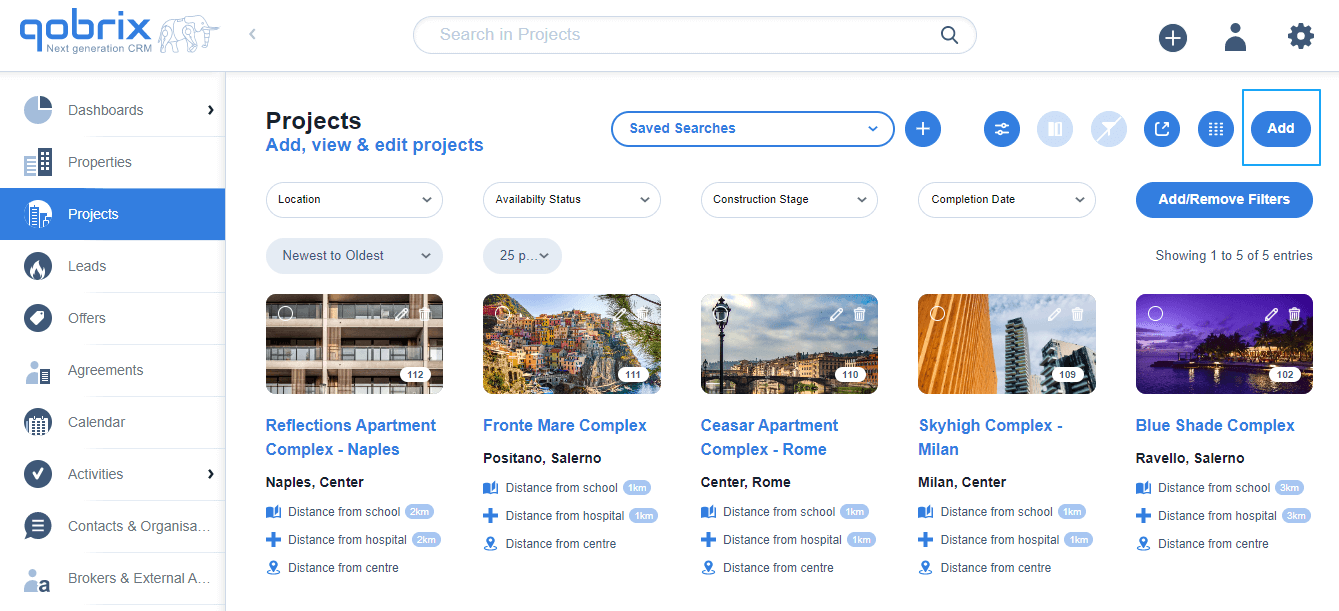
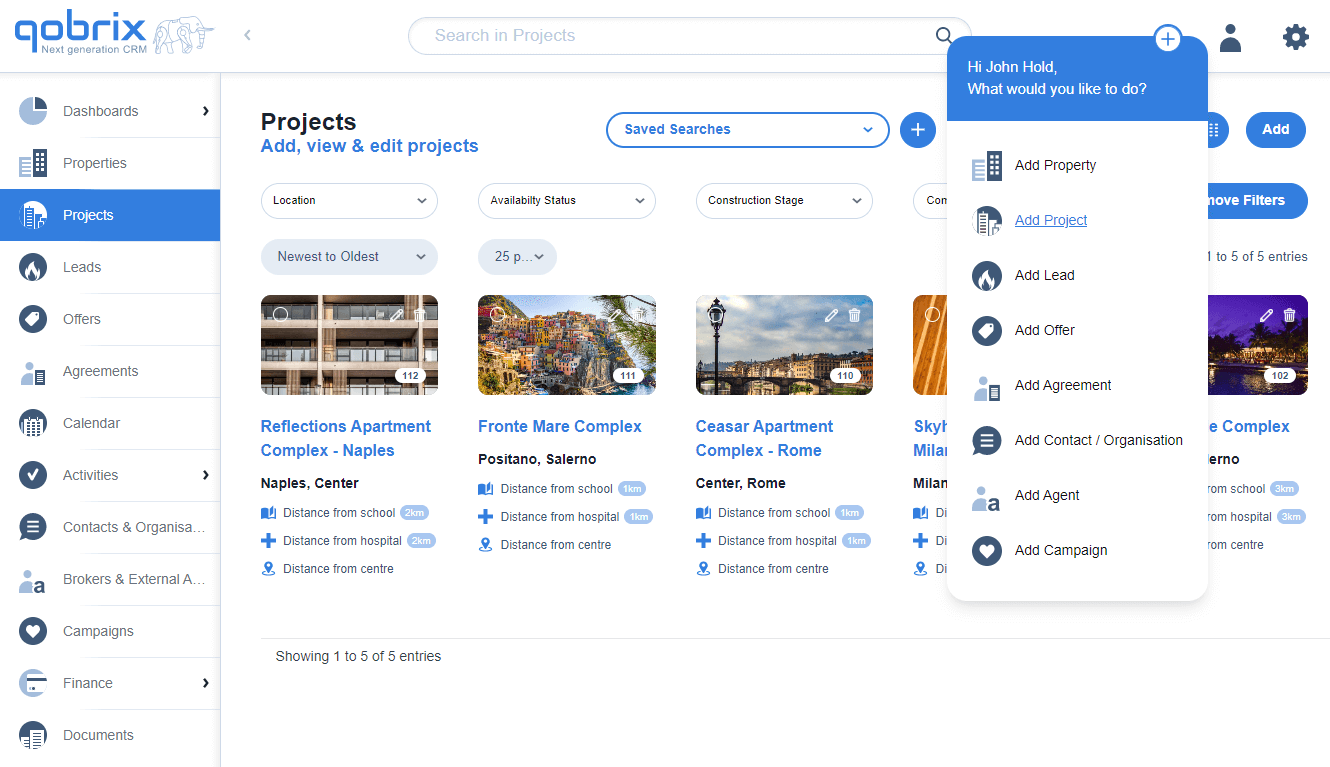
Alternatively you can click on the Quick Add button and choose Add Project from the dropdown menu.
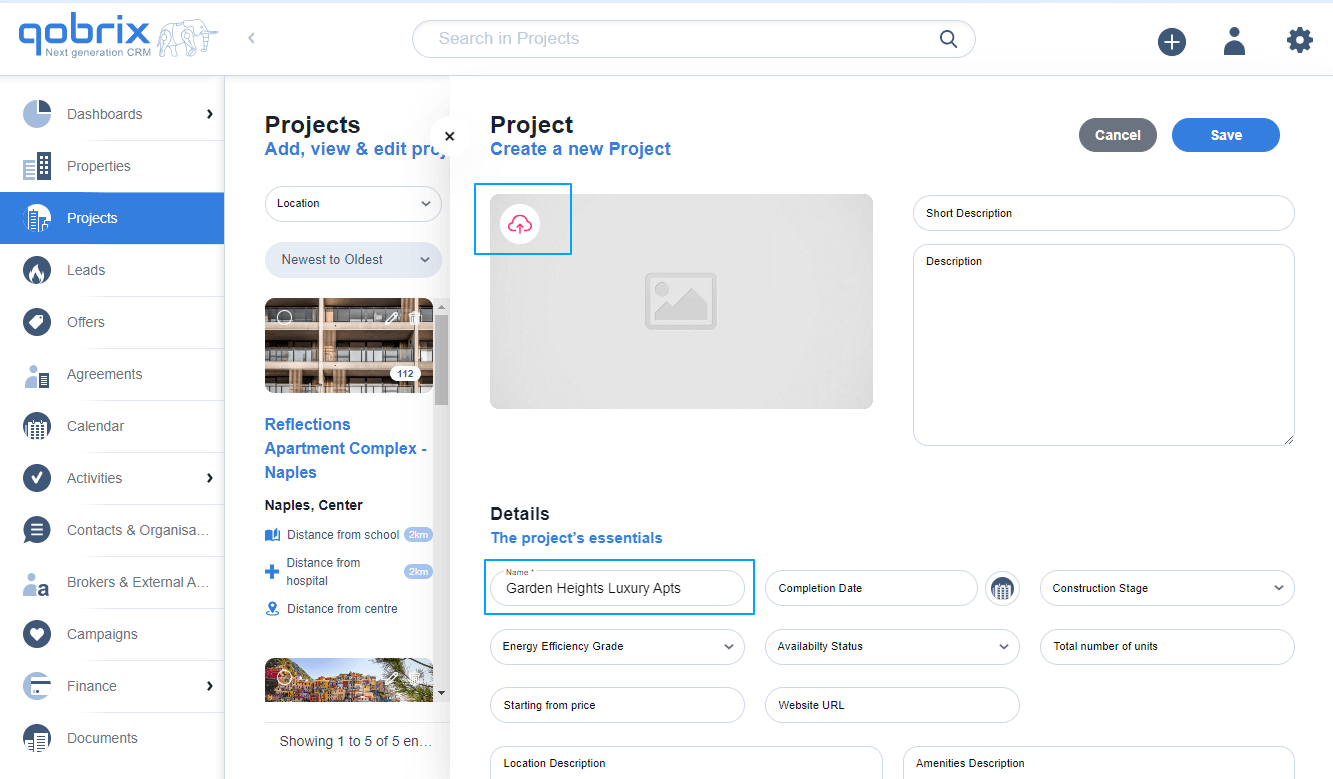
A new tab that lets you configure your project is now open. Here you can add the project image by clicking on the cloud icon on the empty thumbnail as well as add a name for your new project. Complete the rest of the details of the Project, such as completion date, construction stage, availability, number of units available, website and starting from price.
The Projects module allows you to define the distance from the Project to points of interest such as schools, universities, the beach and others. You can do that by populating the relevant fields as seen in the following image.

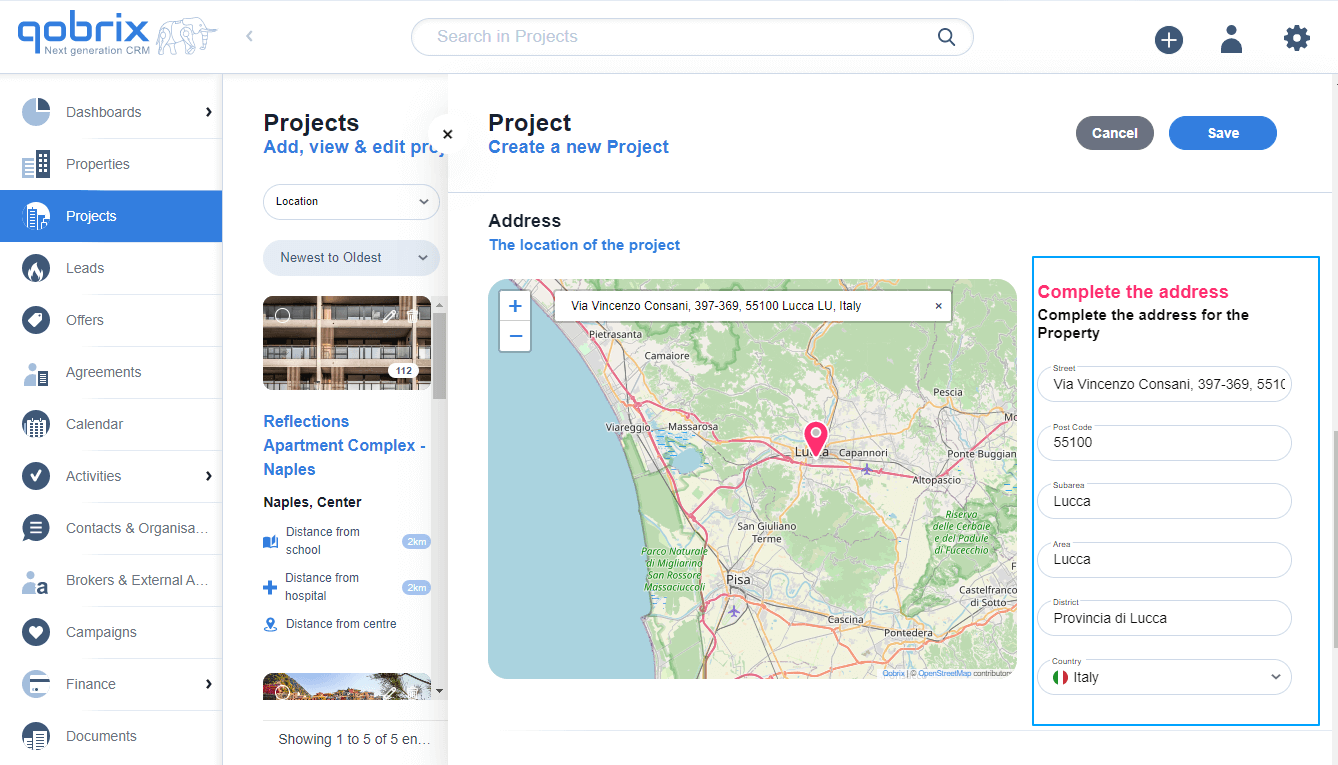
You can also set the location of the Project by using the map function. Choose the location by inputting the precise address of the property or by dragging the pin on the map manually.
Once all the information has been added, you can save the project by clicking on the Save button.
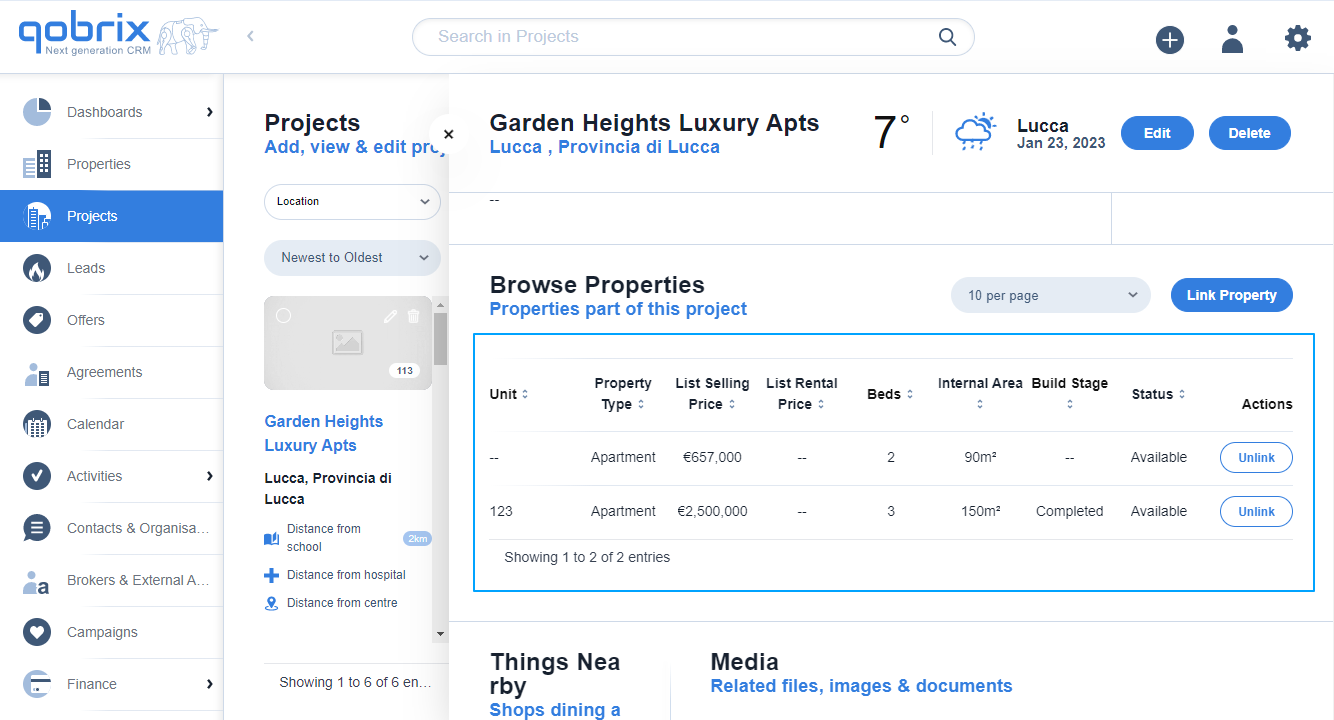
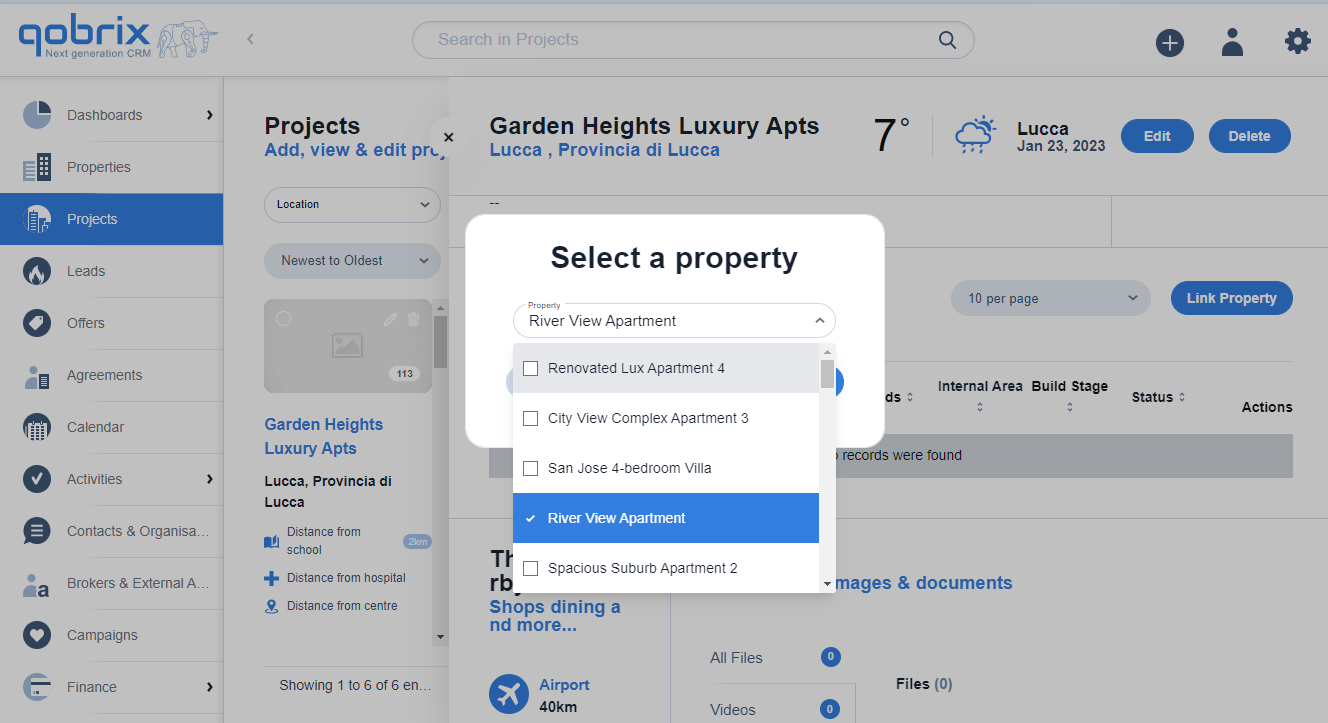
After saving the Project, you can now open it again in order to link the Project to the properties that belong to it. Scroll down and in the Browse Properties section, click on Link Property.
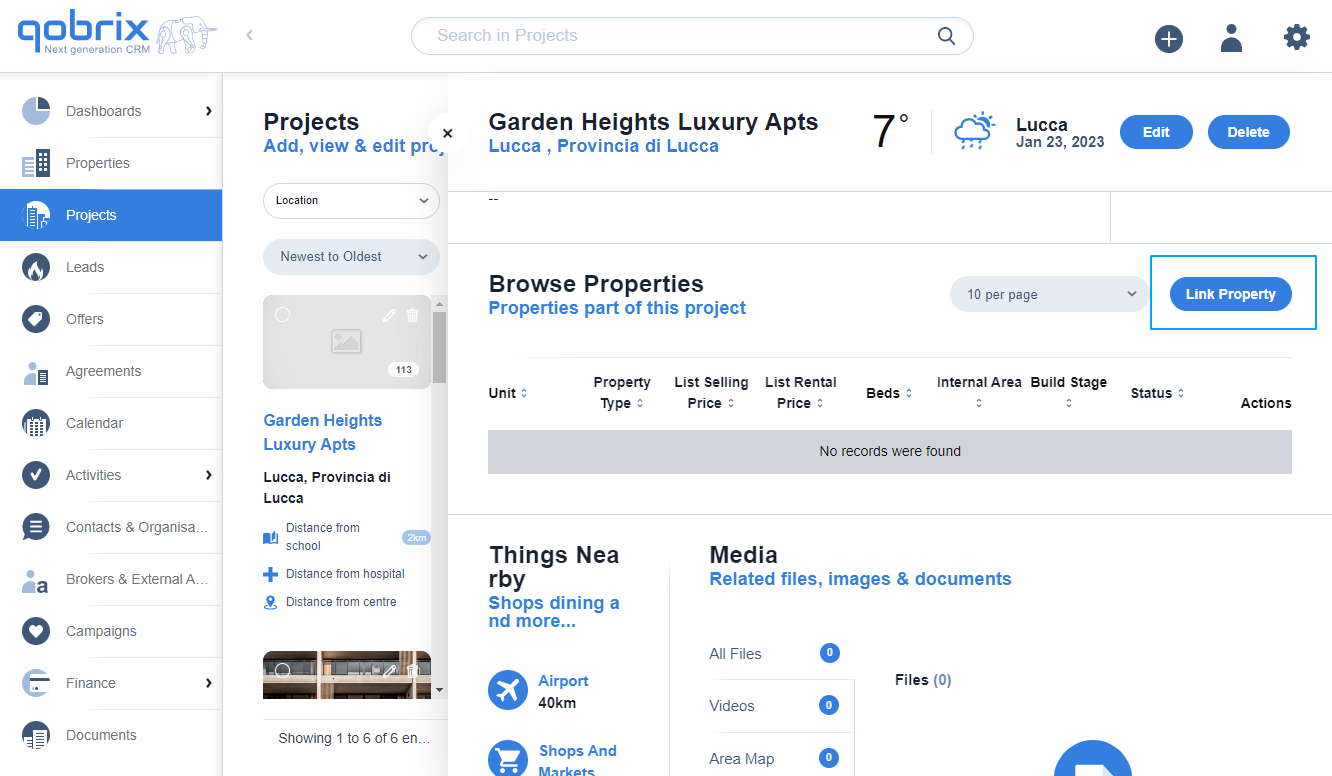
In the popup window, choose the properties you want to link as part of the project and click Submit.
You have succesfully created a new Project and linked properties to it.