Adding a New Property Listing in the CRM
Create a property listing in the CRM with this 12-step guide, set price, location, geocode, link projects, and upload photos efficiently for accurate, professional listings.
1
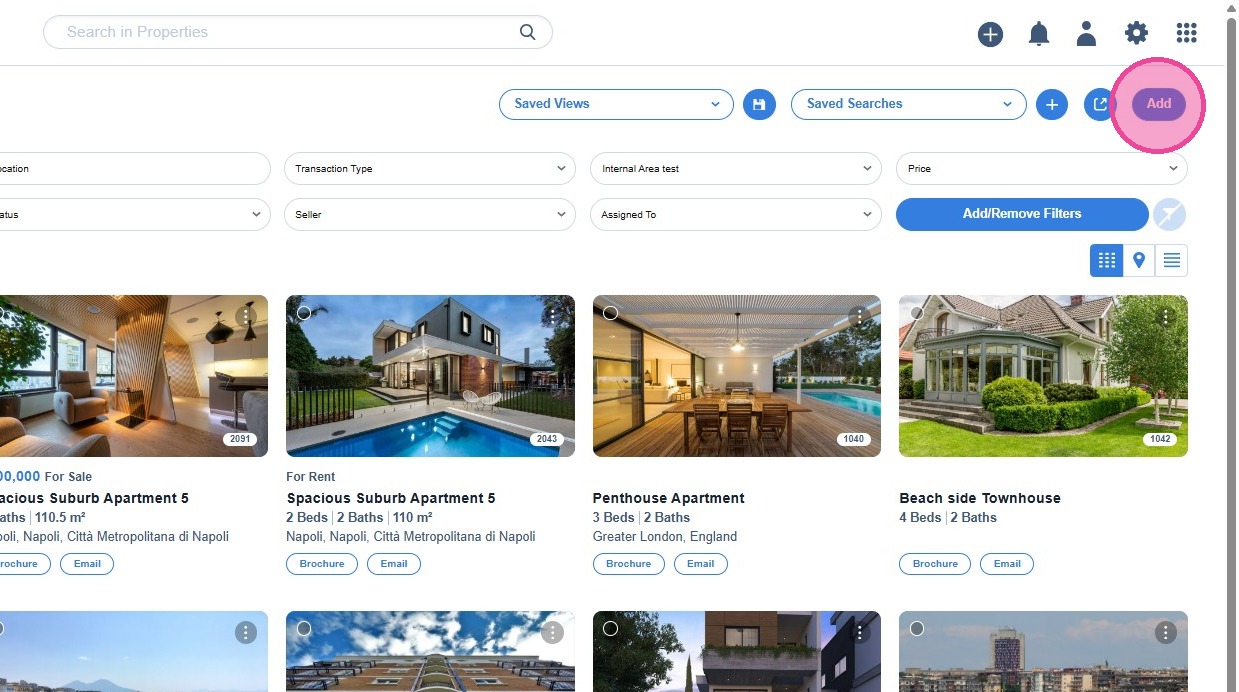
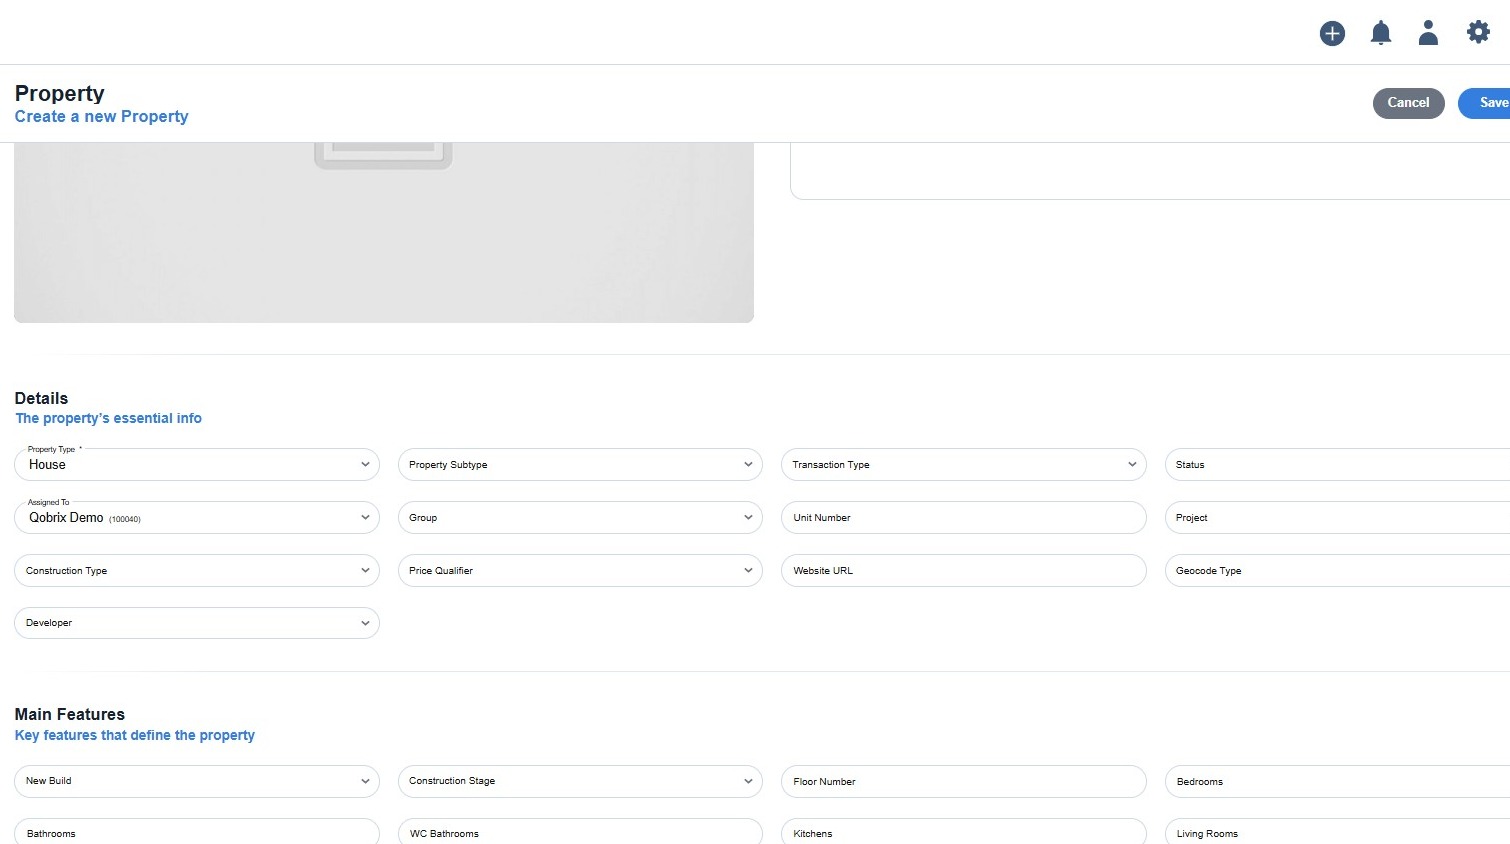
To add a new property, a number of fields must be completed. Click Add to create a new property
2
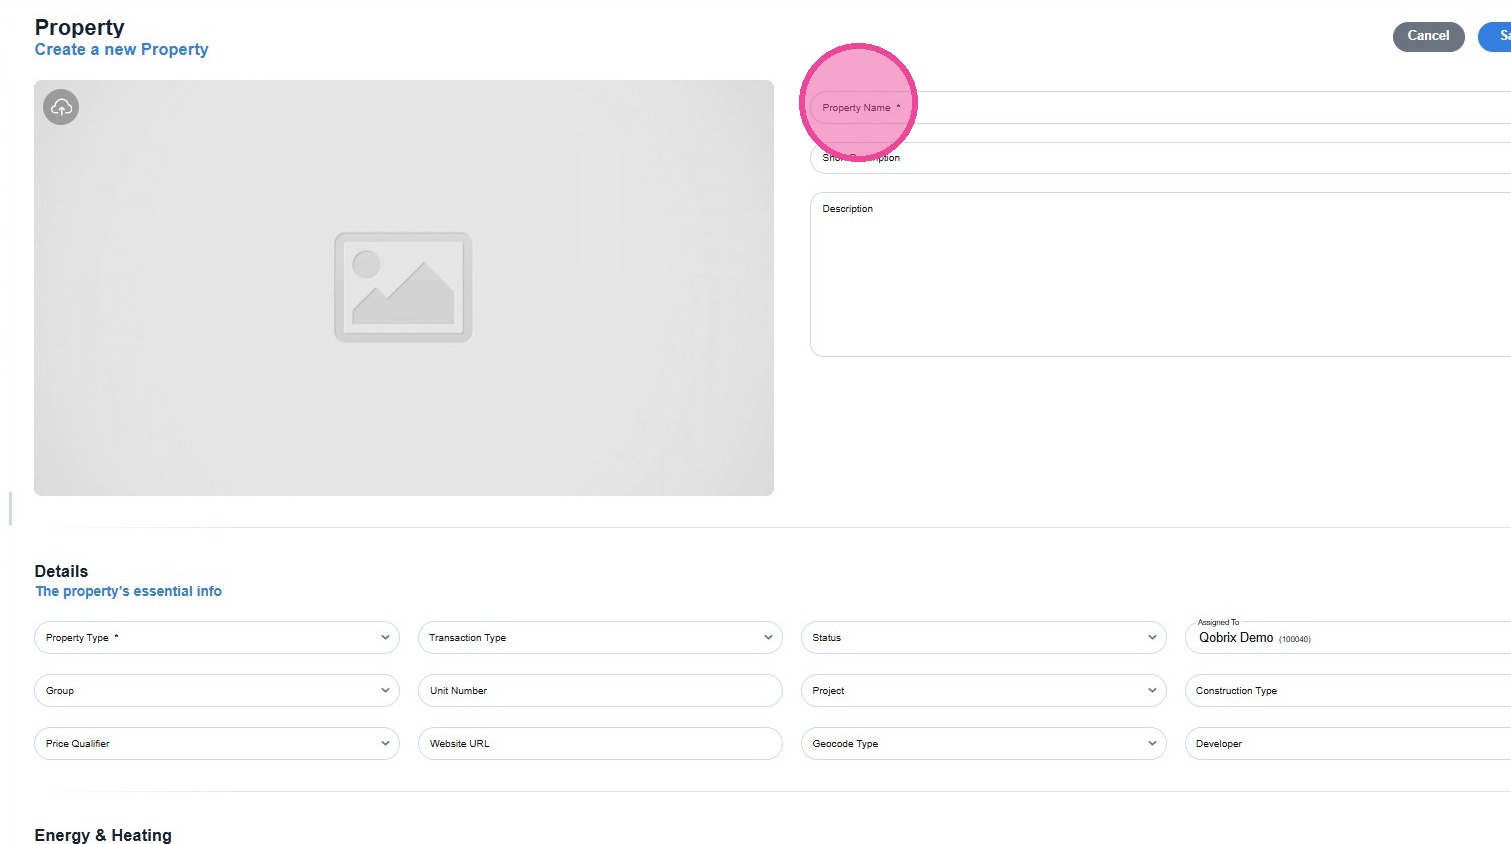
The fields carrying an asterisk (*) are mandatory and must be completed:
- Property Name
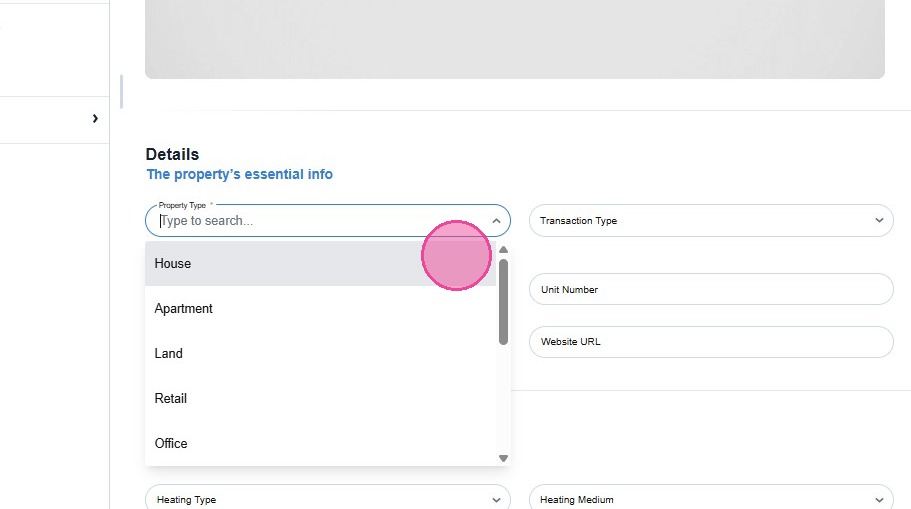
- Property Type
3
Each property type includes a different set of fields which is why it is mandatory to be completed.
4
5
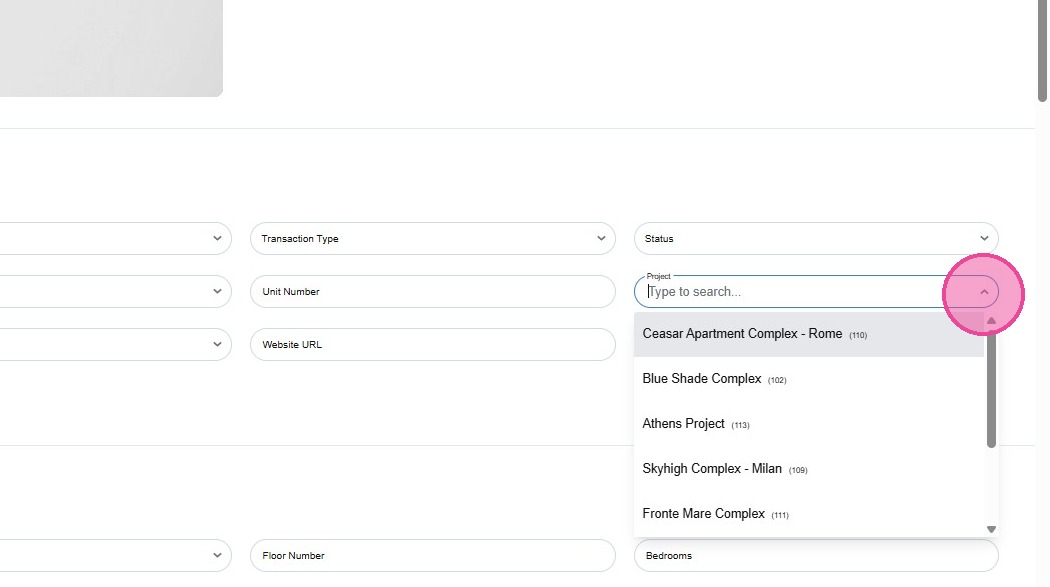
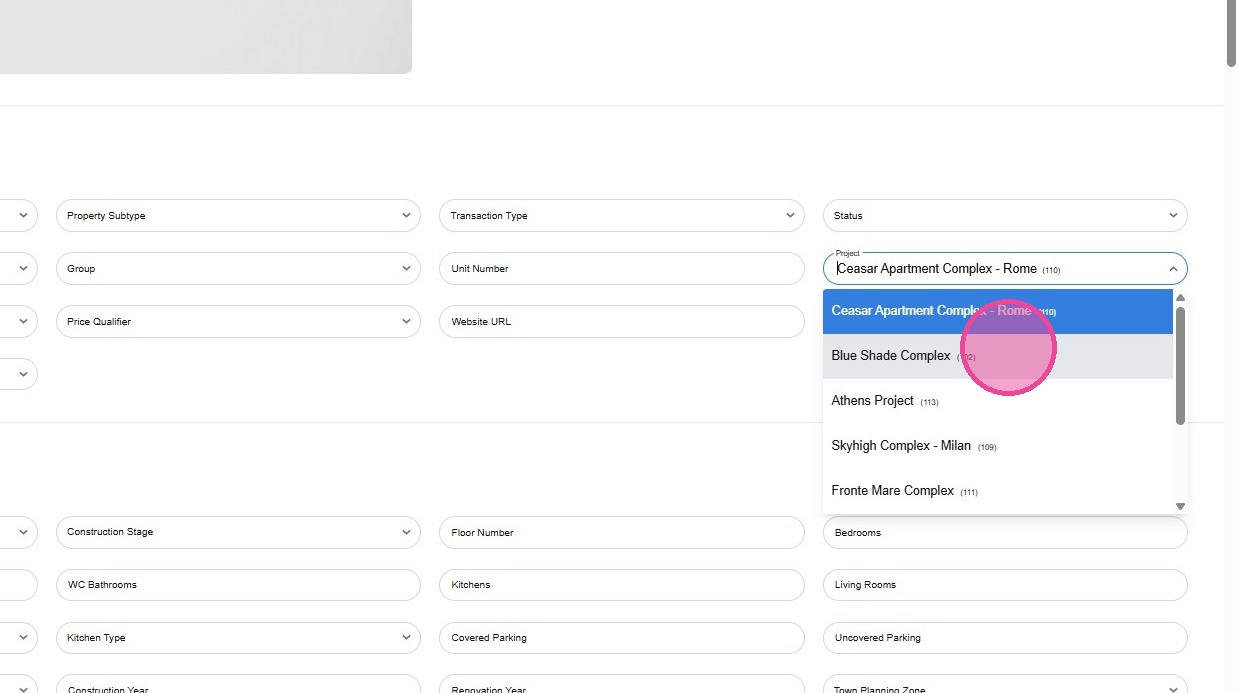
This field, presents the Projects you have created in the CRM and by selecting one, the individual property is linked to the project.
6
7
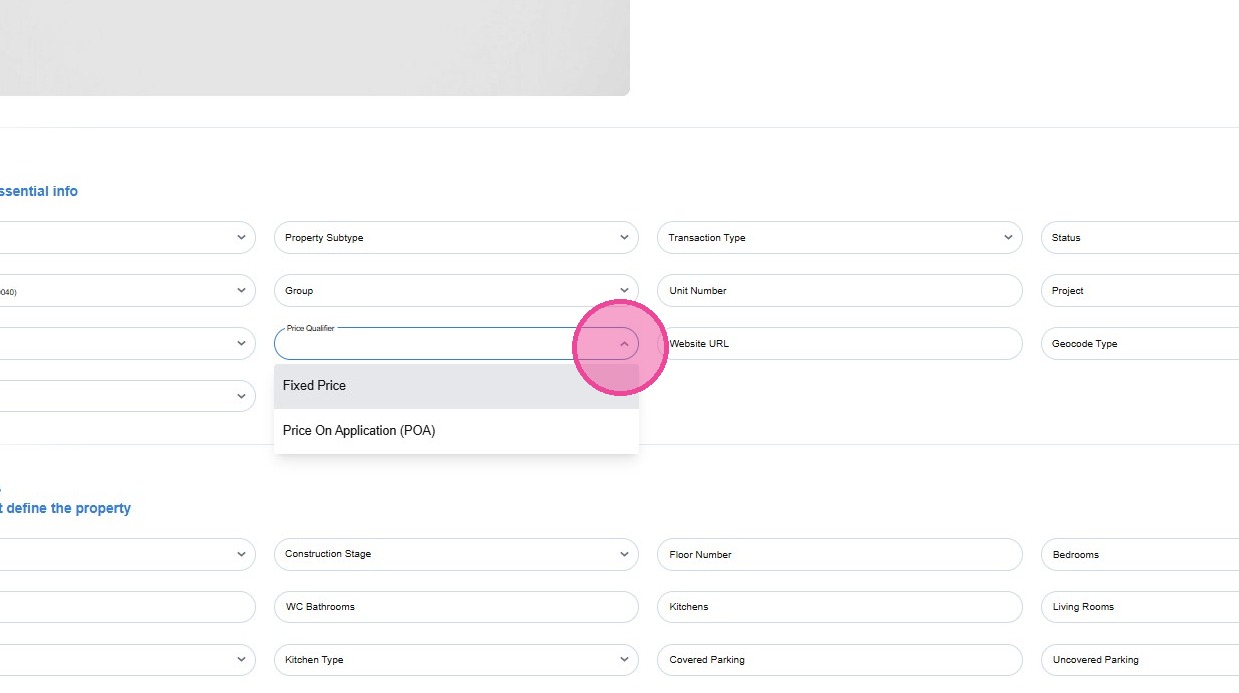
The Price Qualifier field defines whether the price is visible or not on the website:
- Fixed Price: presents the price on the website
- Price On Application (POA): does not present the price on the website but shows POA
8
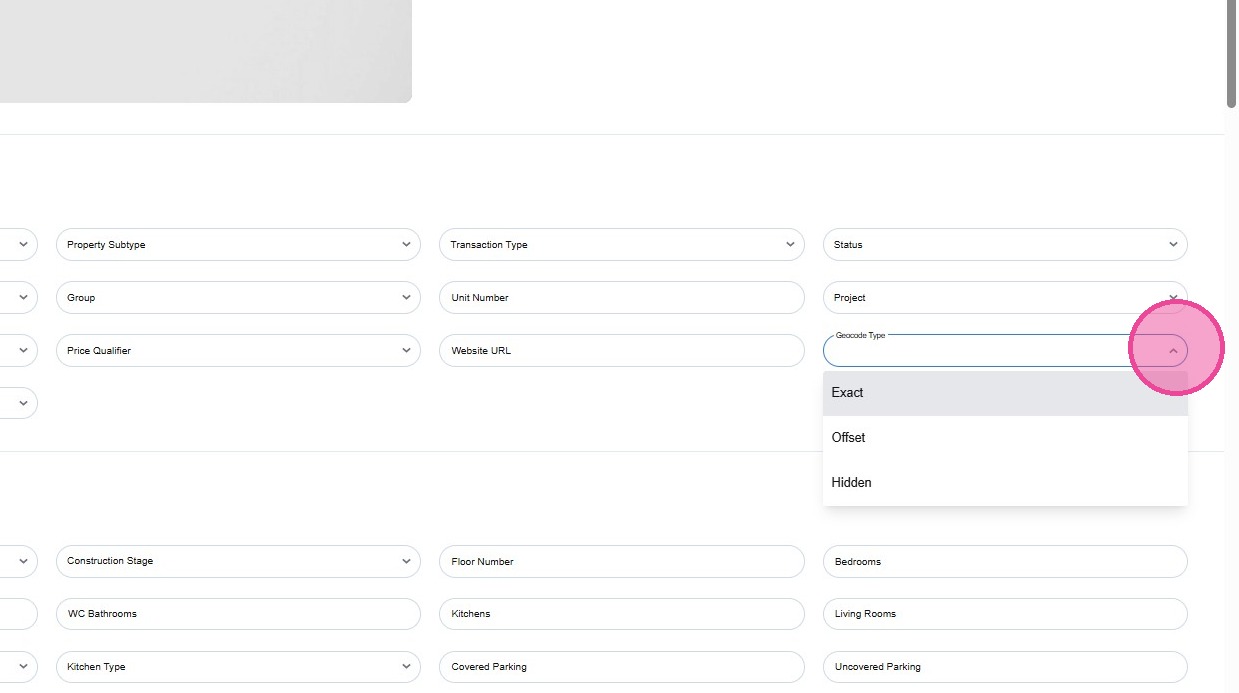
The Geocode Type defines how is the property location presented on the website and integrations:
- Exact: presents the exact location
- Offset: presents the location in a radius
- Hidden: does not present the location
9
One of the most important steps when creating a property, is to add the location.
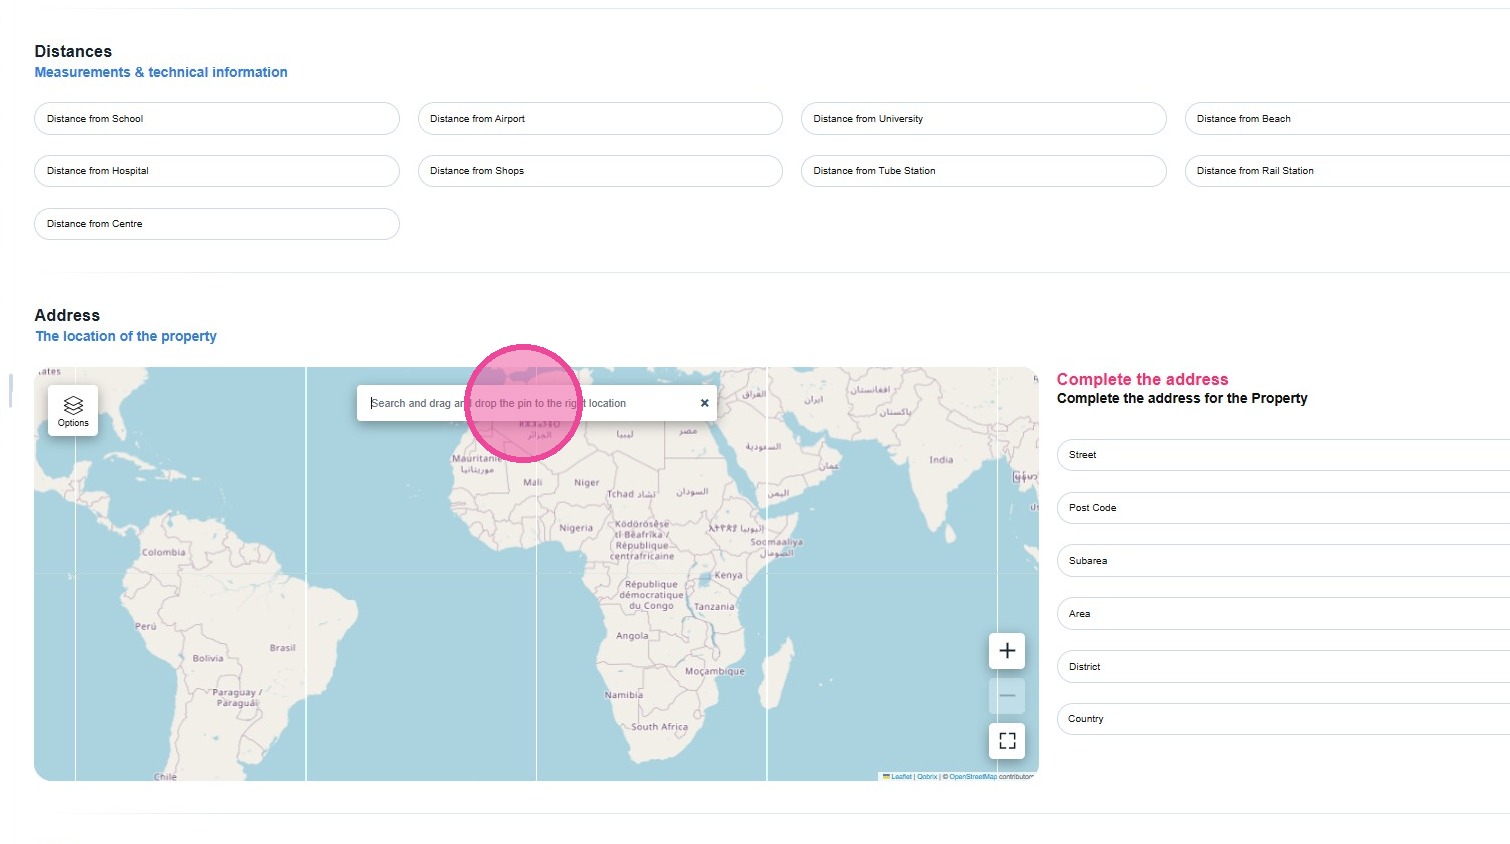
10
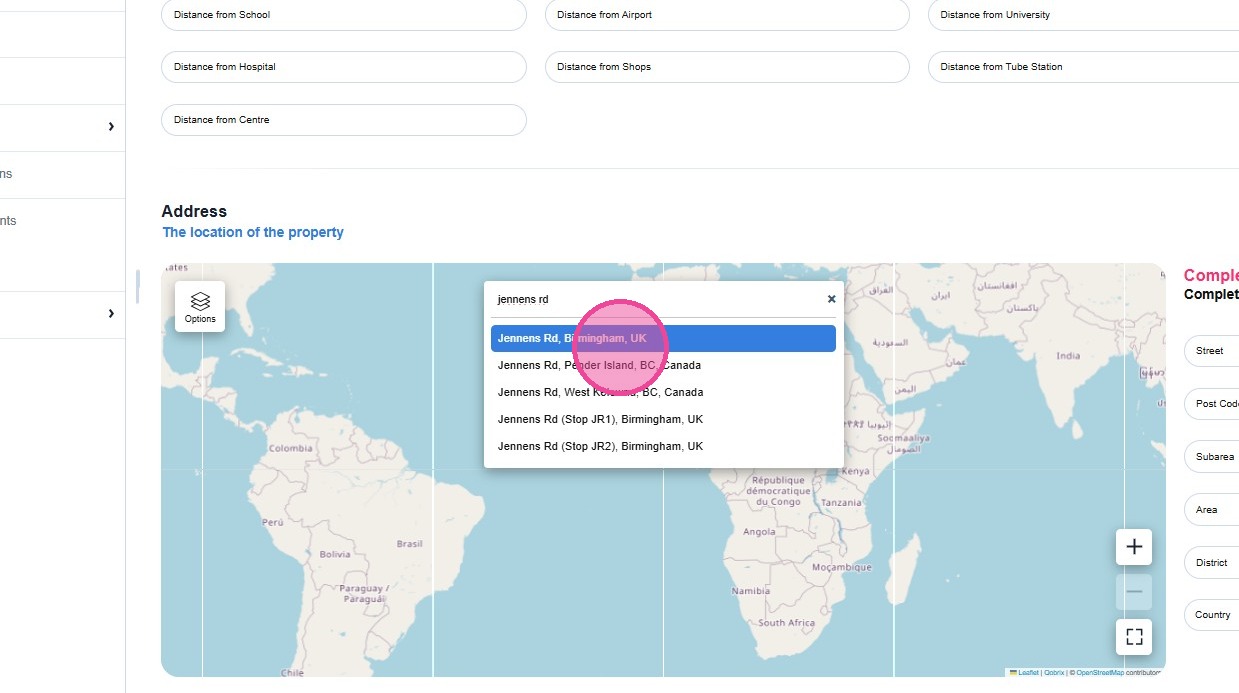
Please feel free to type the street or the area of the property in the Map Search Engine and select the most suitable from the drop-down.
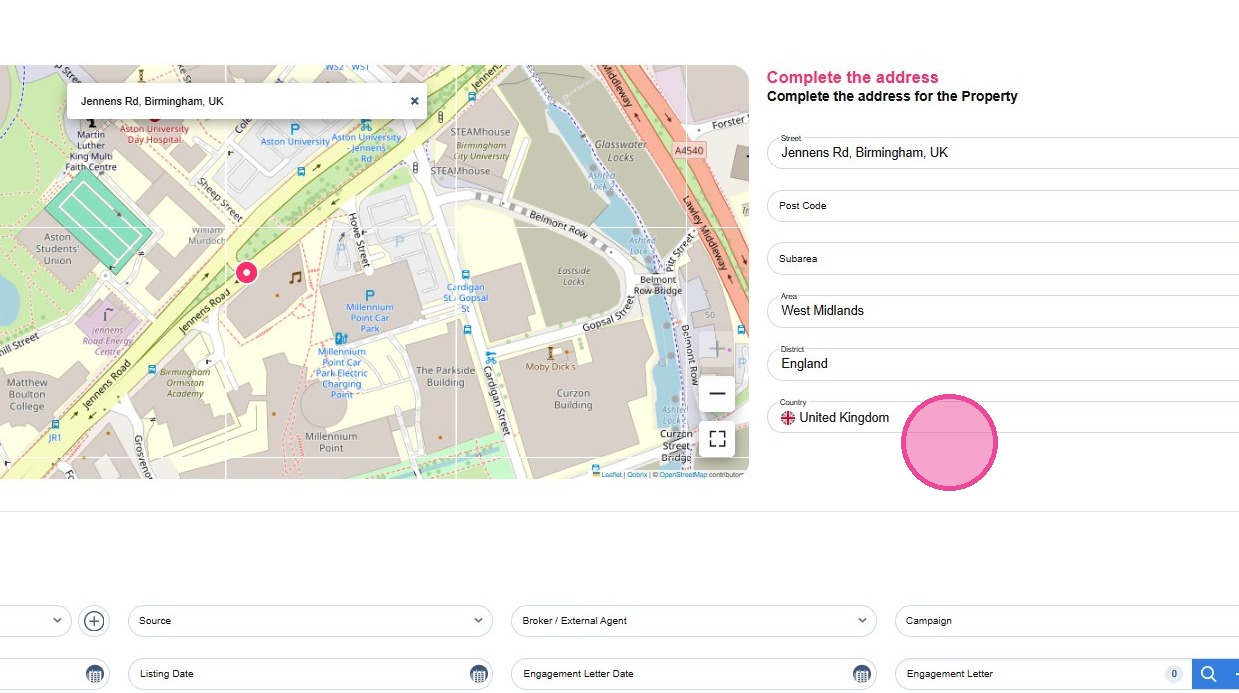
11
When selecting the location from the Map Search Engine, the respective fields are completed automatically.
12
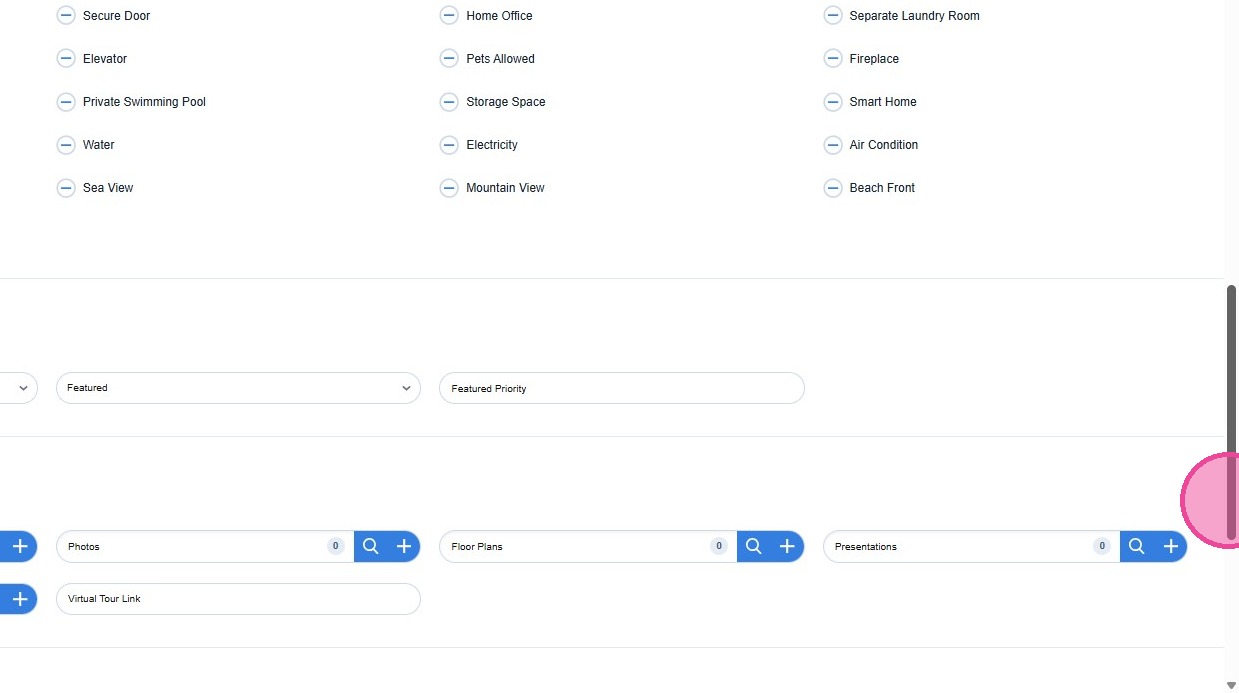
Please refer to the How To Guide: Photos Uploading & Reordering